Mixing a two-component epoxy coating seems basic. It shouldn’t be complicated — measure out the components, stir them together, apply. But in practice, it’s one of the more frequently botched steps in industrial coating application, and the consequences aren’t always obvious at the time.
An under-mixed or incorrectly ratioed epoxy can look exactly like a well-mixed one when it’s applied. It may even look fine when it’s cured. The problems — brittleness, poor adhesion, early inter-coat delamination, soft patches — show up weeks or months into service. By then, tracing the cause is difficult.
Here’s how to do it correctly.
Understanding the Ratio
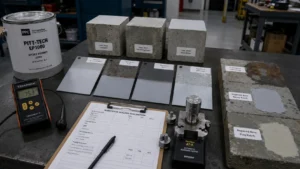
Every two-component epoxy has a defined mixing ratio — Part A (resin) to Part B (hardener) — determined by the chemistry of the system. This ratio ensures that resin and hardener molecules react completely. Too much resin, and there’s unreacted resin in the cured film — making it softer and less chemical resistant. Too much hardener, and there’s unreacted hardener — which can cause amine blushing, surface tackiness, and poor overcoat adhesion. The ratio matters. It’s not approximate.
Ratios are typically expressed by volume (4:1, 3:1, 2:1) or by weight. Volume ratios are more practical in the field — most manufacturers pack their products in pre-measured containers specifically so that mixing the whole unit gives the correct ratio automatically. If you’re decanting partial quantities, use a calibrated measuring vessel — eyeballing it is not acceptable for quality work.
The Mixing Procedure, Step by Step
- Stir Part B (hardener) before use. Hardener components can settle or stratify during storage — particularly zinc dust in zinc-rich systems. A settled hardener will give an incorrect effective ratio even if the volume is correct.
- Pour Part B into Part A (or as directed — some manufacturers specify the reverse). The order matters less than thoroughness, but follow the TDS.
- Mix with a mechanical mixer — a power drill with a paddle attachment. Hand stirring is not adequate for most two-component systems, particularly high-viscosity solvent-free epoxy. Mix for the time specified on the TDS, typically 2–3 minutes minimum.
- Scrape the sides and bottom of the container thoroughly during mixing. Unmixed resin or hardener sitting at the edges of the can is a common source of under-cured patches in the finished film.
- Pour the mixed material into a clean second container and mix briefly again — this catches any unmixed material from the first container.
- Wait the induction time, if specified.
- Apply within the pot life.
Step 5 — the ‘boxer’s turn’ — is the one most often skipped under time pressure. It’s also the step that catches the unmixed fraction that inevitably collects at the corners of the mixing container. Skip it and you’re applying a mix that’s mostly correct but has pockets of unreacted material.
For a complete walkthrough of what happens next — spray settings, application conditions, overcoat intervals, and inspection hold points — see how to apply epoxy coating on steel.
Induction Time: Wait Before You Spray
Some epoxy systems — particularly amine-cured ones — require an induction period after mixing before application. This is sometimes called ‘sweat-in time’. During this period, the initial reaction between resin and hardener modifies the system chemistry to optimise film formation.
Apply before the induction time is up and you get poor inter-coat adhesion, amine blushing (a waxy, white surface haze caused by amine reaction with atmospheric CO₂ and moisture), or slow cure. The induction time is printed on the TDS and is temperature-dependent — shorter at higher temperatures, longer in the cold.
Pot life and induction time together define your application window: start not before the induction time is up, stop not after the pot life expires.
For a detailed explanation of how pot life works, why temperature compresses it, and how to manage it on hot-weather projects, see what is pot life in epoxy coating.
Thinning: When It’s Allowed and When It’s Not
Most epoxy TDS sheets specify a maximum thinning amount — typically 5–10% by volume — using an approved thinner (usually specified by product code, not just ‘xylene’ or ‘MEK’ generically). Thinning beyond the stated maximum reduces film build, affects the volume solids content and therefore the achieved DFT, and can cause surface defects including pinholes and craters.
The most important thing about thinning: thinning does not extend pot life. A common misconception is that adding solvent to thickening material ‘resets’ it. It doesn’t — it reduces viscosity temporarily while the cross-linking reaction continues to advance. Material thinned past its pot life will not cure properly, regardless of how runny it looks.
For solvent-free epoxies — which are specified precisely because they don’t contain volatile solvents — thinning may be explicitly prohibited, or allowed only in tiny amounts for equipment flushing purposes. Check the TDS.
Hot Weather Mixing: Smaller Batches, Faster Cycles
In high ambient temperatures — above 30°C, or with substrate temperatures above 40°C — pot life compresses significantly. A product with a 4-hour pot life at 23°C might have less than 90 minutes at 35°C. The practical response is to mix smaller batches more frequently, rather than trying to apply one large batch under time pressure.
Working in the early morning before peak solar heating, using insulated mixing containers to slow heat transfer to the mixed material, and switching to slow-cure hardeners (if the manufacturer offers them) are all legitimate adaptations. Attempting to apply material that has visibly thickened past spray-ability is not.
Questions That Come Up
Can I add more hardener to speed up the cure?
No. Adding excess hardener doesn’t accelerate cure — it creates an off-ratio mix with unreacted hardener in the cured film. The film will be softer, possibly sticky, and prone to amine blushing. If you need faster cure, use a fast-cure hardener grade if the manufacturer offers one, or increase the application temperature (within limits).
What if I accidentally mixed the wrong ratio — can I fix it by adding more of the deficient component?
In theory, if you catch it immediately before any significant reaction has occurred — within a few minutes — adding the missing component and re-mixing thoroughly might correct it. In practice, by the time most people realise the ratio was wrong, the reaction has already progressed unevenly. The safest response is to discard the batch and start fresh with correctly measured components.
How do I clean equipment after mixing?
Clean immediately after use — two-component epoxy cures hard and becomes extremely difficult to remove once polymerised. Use the manufacturer’s recommended thinner (typically xylene or MEK). Flush the spray equipment thoroughly, then clean further with fresh thinner and brush. Hardened epoxy in gun tips, pumps, or hoses requires mechanical removal or stripping agents, which damage equipment over time.
For a detailed comparison of epoxy and polyurethane systems — including which applications suit each type and how selection affects mixing and application requirements — see epoxy vs polyurethane coating: how to choose.
To understand how mixing errors connect to broader application failures — blistering, delamination, cracking, and early coating breakdown — see common coating failures and prevention.
Send your project coating product, application environment, and substrate conditions via the project inquiry form and our technical team will advise on mixing procedures, pot life management, and system selection.